
It happens every show. You have a limited amount of time and you need to help an actor change suits. You only have one minute to complete to change, and it feels impossible. What do you do? This is when you start considering quick rigging for the clothing! Especially in modern musicals, the changes are so fast and frequent that most pieces you see on stage are probably rigged in some way to make them easier to take off and put on. One of the most basic costume-rigging tricks in the book is quick rigging a dress shirt! In this tutorial, we will walk you through step by step the basics of how it is done.
This post may contain affiliate links. We only recommend products we have tried and tested ourselves. If you use these links to purchase something, we may earn a small commission at no additional cost to you. These links help us cover the running costs of The Wardrobe Guide! Read our full disclaimer.
Why Would I Quick Rig a Dress Shirt?
You might quick rig a shirt for many different reasons. Your actor might have a hard time with typical buttons. Maybe the change is choreographed so you are buttoning the shirt while the actor does something else. It is typically easier to fasten snaps than buttons when dressing another person. Maybe the actor needs to yank open the shirt on stage.
My rule of thumb is that if an actor is changing into a suit, and they have less than 3 minutes between the time they exit the stage and the time they re-enter, you can plan on the actor’s costume pieces to need rigging.
Closures You can Quick Rig on a dress shirt
Center Front Placket
Cuffs
Tie*
Hem*
*denotes a quick rigging practice that we will look further into in future articles.
What Notions Do I Use to Quick Rig?
When rigging the Center Front closure of a dress shirt, it is usually done in one of three ways. You will either rig the item with snaps, velcro, or with magnets. (There is also a way to rig a dress shirt with a zipper, which we will discuss later).
No way of doing anything will ever be perfect, there are pros and cons to everything. However, when choosing what notion you should use for the garment, consider what is the most important to you with that garment. If working under a supervisor, make sure you run any quick change thoughts by them before making the note.
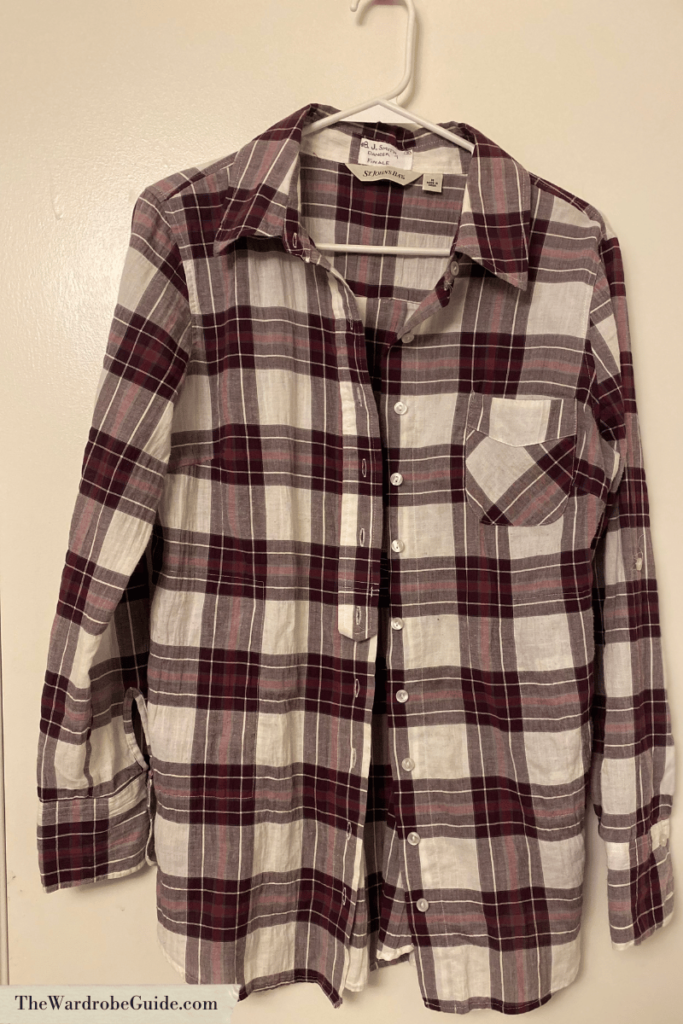
Snaps
Snaps are the most popular way to quick rig a dress shirt for the stage. If there is a shirt that a character needs to unbutton/ roll up the sleeves on stage, you might see a size 3 snap as the cuff rigging as well. Most tie quick rig methods will also require snaps. We will be using snaps in our quick rigging tutorial below.
Pro
- Won’t accidentally stick to other costumes or itself.
- Easy to Wash
- Precise
Con
- Requires precision while dressing
- Each snap has to be matched together individually.
- Slightly slower than the other QR options.
How to Pick the Correct Size and Color Snap
Snaps come in various sizes and colors. When it comes to rigging the center front placket in a dress shirt, you will typically use either a size 3 or a size 4 snap in silver or black.
Different dressers and supervisors will have different opinions on their favorite size or color of snap to use, so this is an instance where it is best to check with your supervisor before moving forward. Some supervisors feel that size 4 snaps are too big to use in closures, while some feel like size 3 isn’t strong enough. Sometimes, a supervisor might feel like silver snaps will shine under stage light, and that black snaps are more discrete. Some people don’t think black snaps are easy enough to see in the dark backstage.
Personally, my preference is typically size 4 snaps, and I’ll match the color to the shirt. This means if the shirt is a light color, I’ll pick a silver snap. If the shirt is darker, I will pick a black snap.
Velcro
Velcro is the second most popular shirt quick rigging you will see. Some people love velcro, some people hate it.
Pro
- Faster than snaps
- Not as much precision is needed to match the sides together
Con
- Can cause wear on the fabric of your costume or surrounding costumes
- Can stick to things it shouldn’t
- Precision can be harder in instances when it is needed.
Magnets
Magnets are seen by some as the “fastest” closure. Because of this, they are used heavily in “quick change magic” changes. Magnets are also fairly trendy with designers if the designer has a say in quick change function.
Pros
- Very Fast
- Little Precision needed
- Once you match one pair up, they should all match together.
Cons
- Might want to stick to themselves or any surrounding metal.
- Can be difficult to control in certain changes
- Will stick to the washer when washed. Dry Cleaning can mess up the polarization/ pull them out.

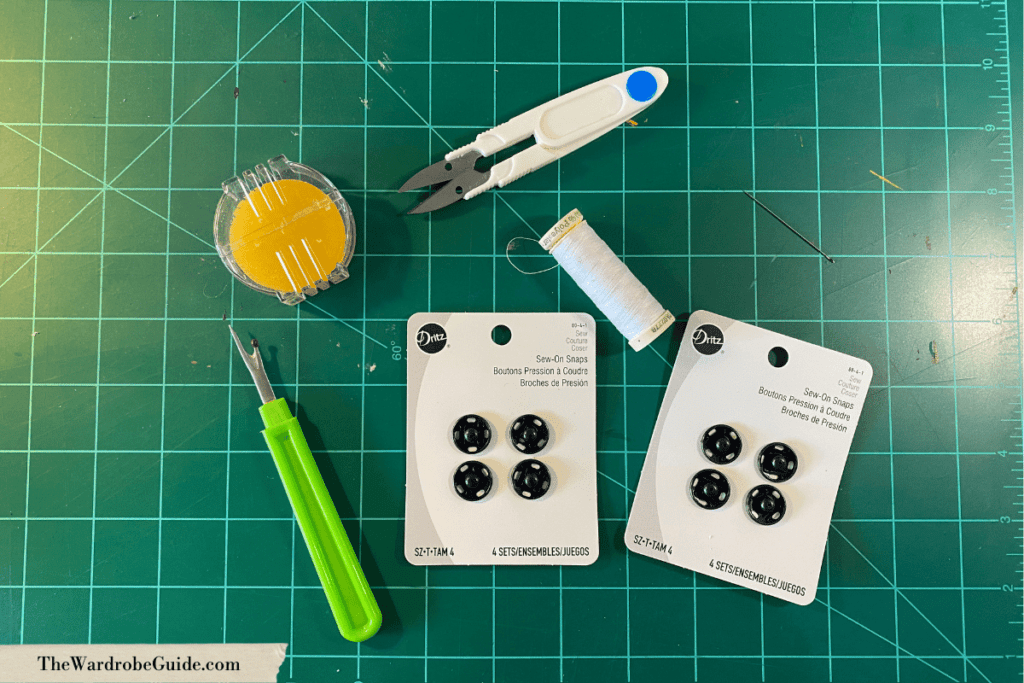
What You Need to Rig With Snaps
Snaps (as many as you have buttons)
Thread
Snips
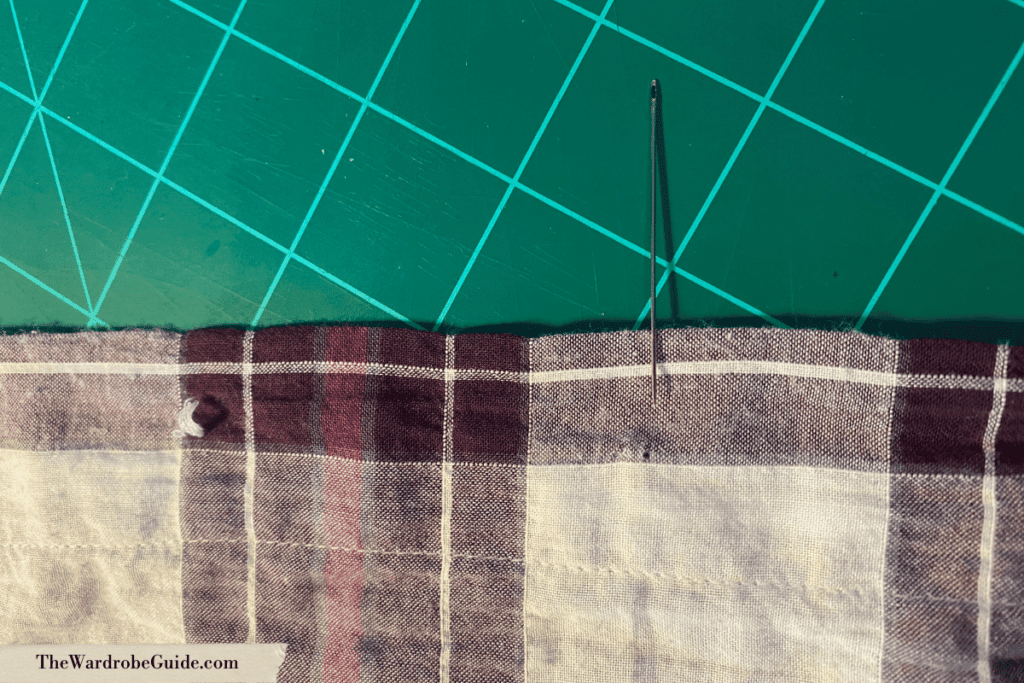
Hand sewing needle
(Optional) Marking tool
Read More: Basic Hand Sewing Tools
Step By Step Shirt Quick Rigging (with Snaps)
Center Front Closure
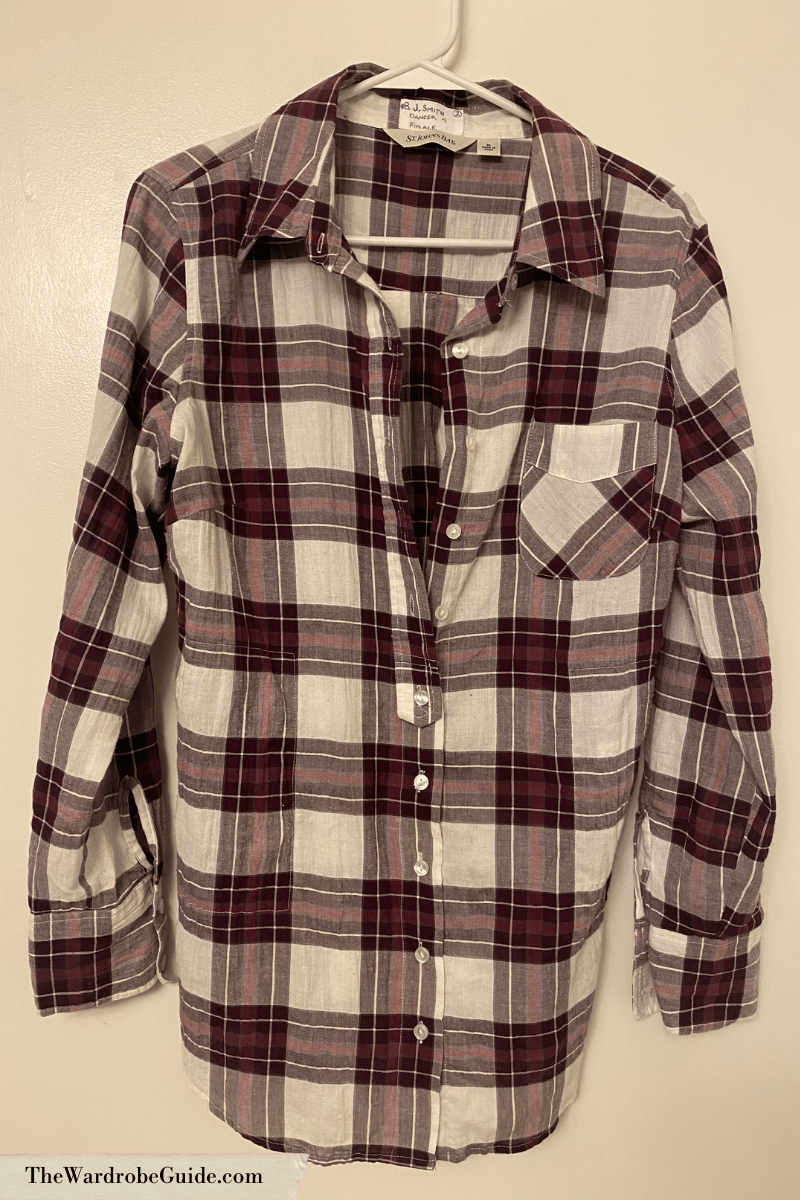
1) Remove Current Buttons
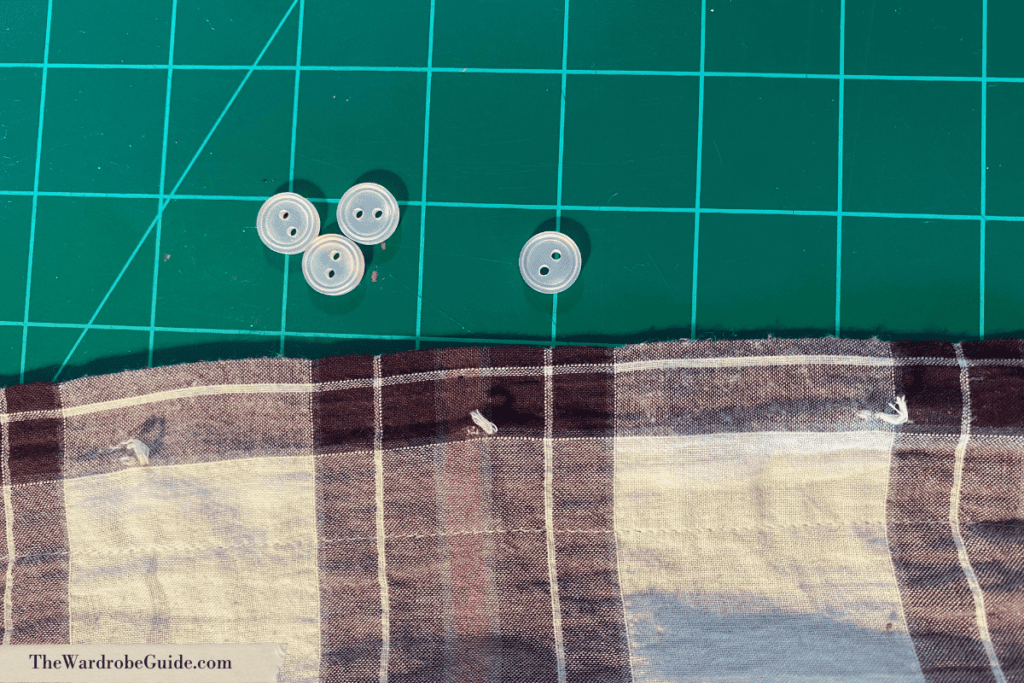
Start by Removing the Buttons from the CF Placket of the dress shirt with your seam ripper. After they are removed, you will notice tiny holes where the button’s stitching used to be. These holes will help you mark where the snaps should go.
If the shirt is worn with any of the buttons unbuttoned (usually the top 1-2 buttons, but maybe more), leave those buttons attached to the shirt. You are only removing the closures that you are going to rig, and you are only rigging the closures that will be actively opened/ closed during a quick change.

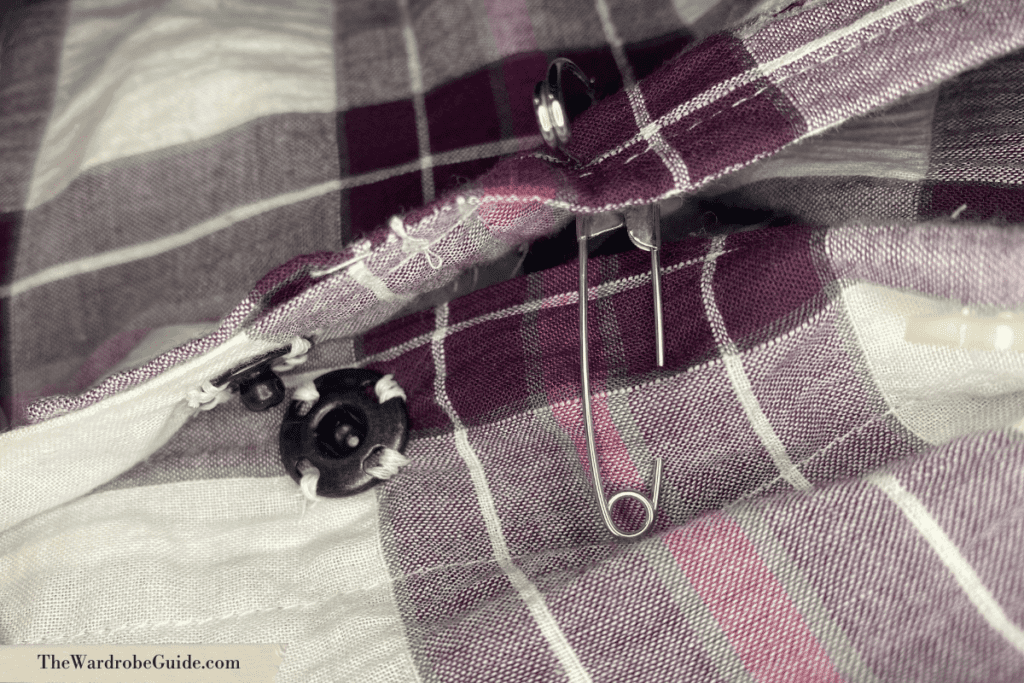
PROTIP: If you need help remembering exactly what buttons do or don’t need to be rigged, throw a safety pin in the shirt that notes the button you are rigging up to.
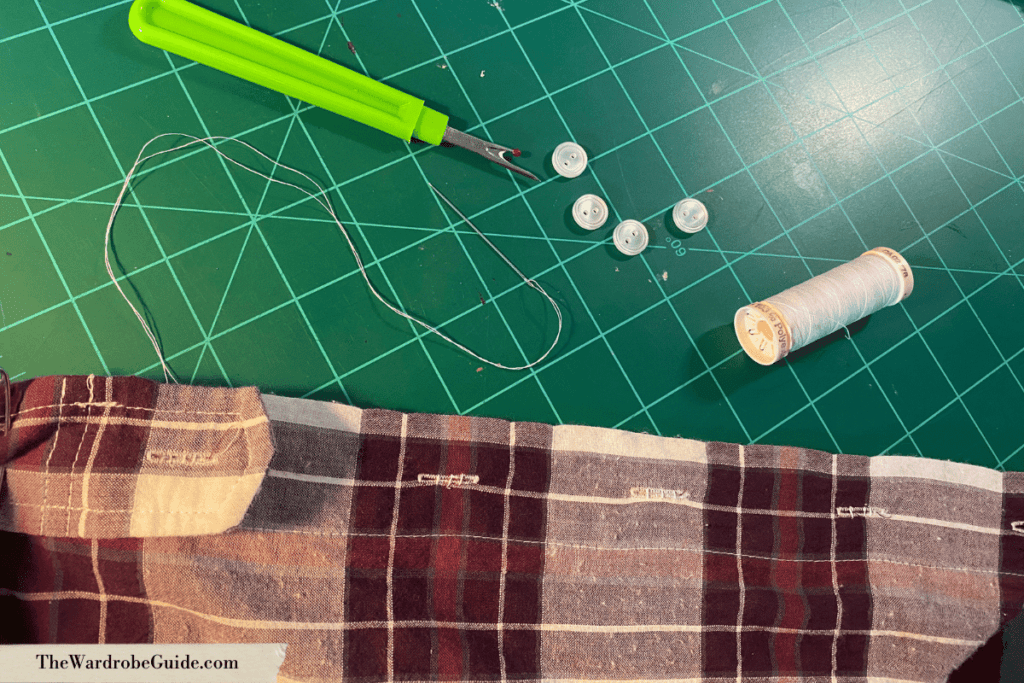
2) Re-Stitch the Buttons Over the Buttonholes
When picking thread color, note the color of thread they were stitched on with originally, and match it. Try to stitch all of the buttons so they are oriented the same way. Depending on the buttons, you might have to whip stitch the button holes closed before adding the button.
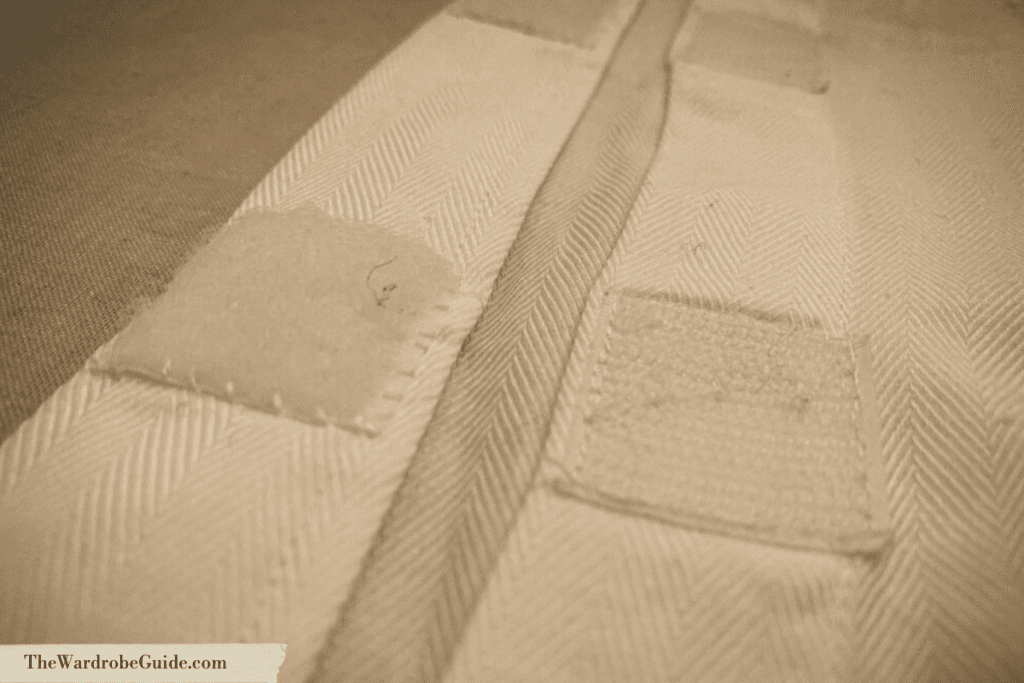
3) Add the Snaps
Stitch the “male” snaps to the underside of the buttonholes. Typically, male snaps go on top, as they sit flatter than female snaps do. Therefore they are less visible from the outside of the garment.
PROTIP: Check to make sure your stitches are not visible from the outside of the shirt.
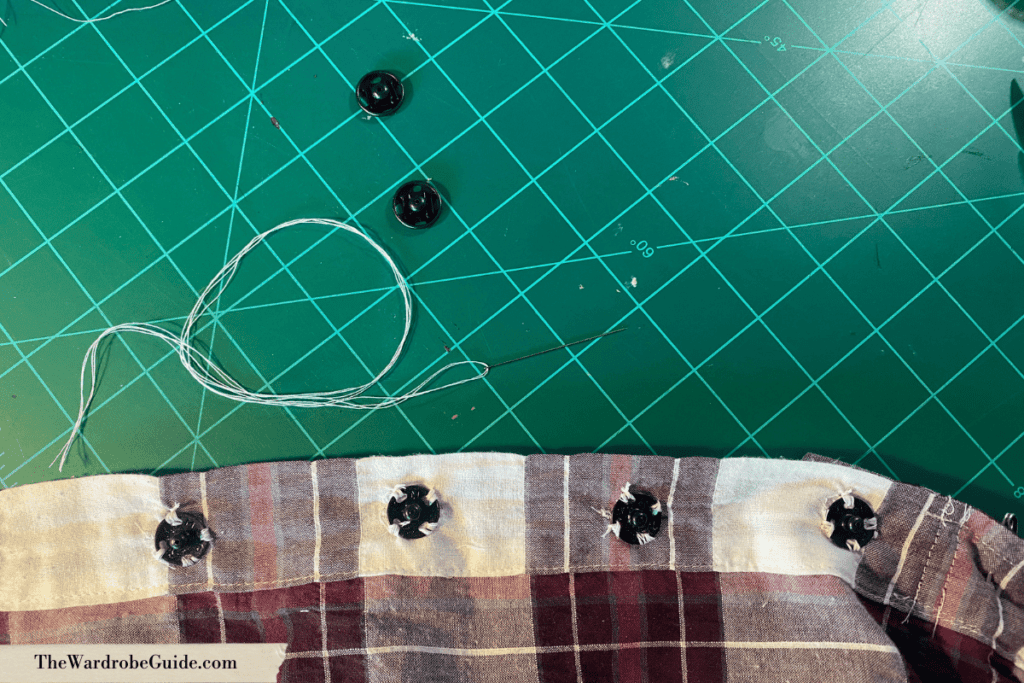
Next, add your “female” snaps where the buttons were attached to the shirt at the top of this project.

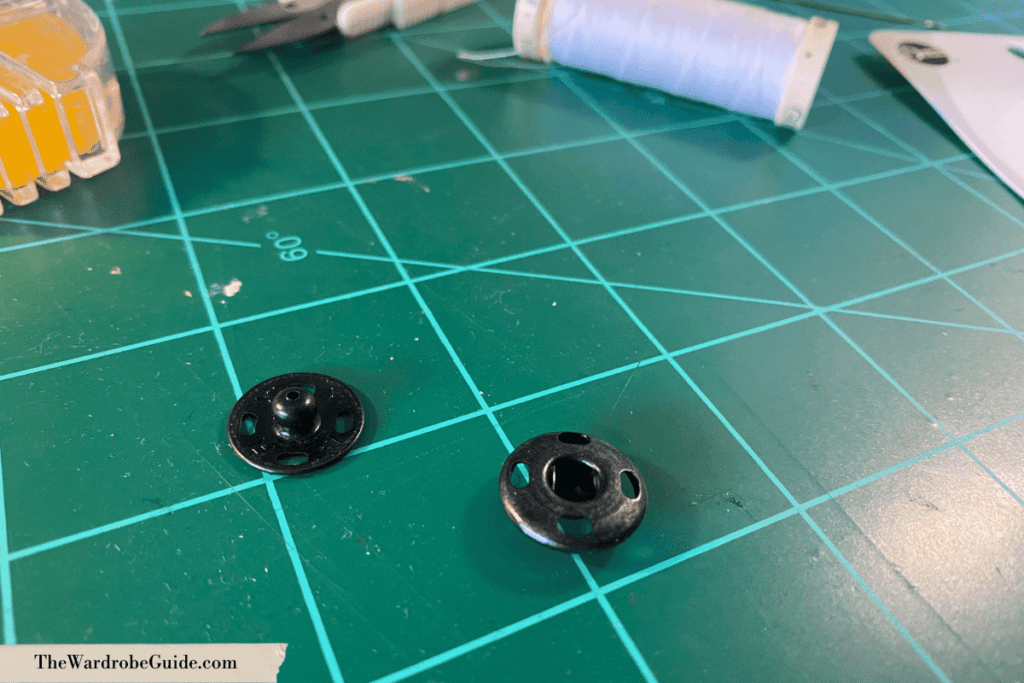
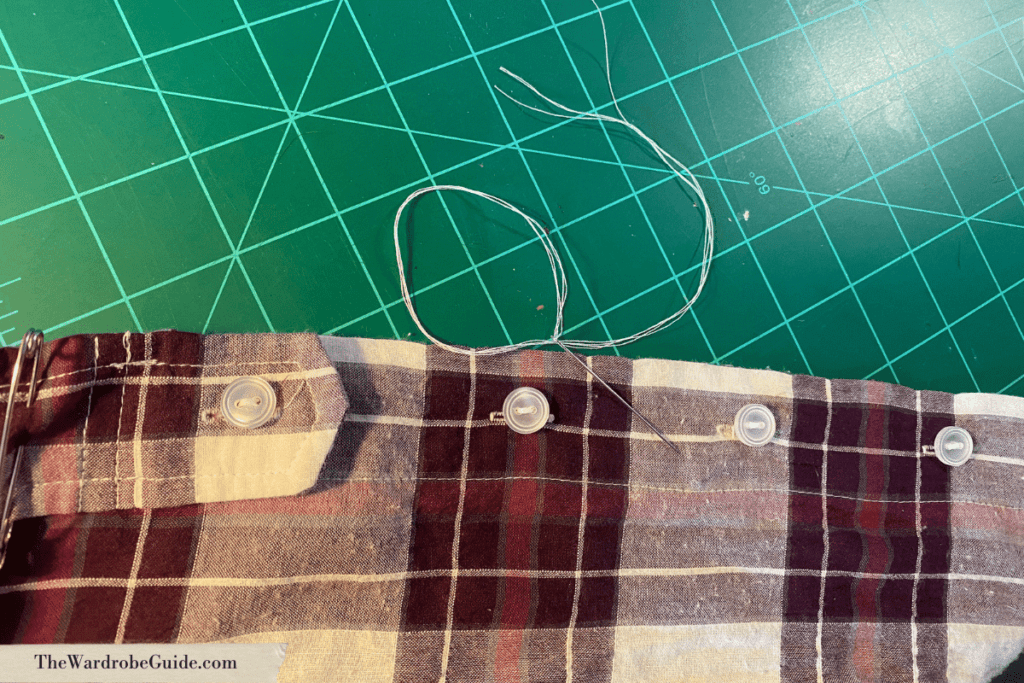
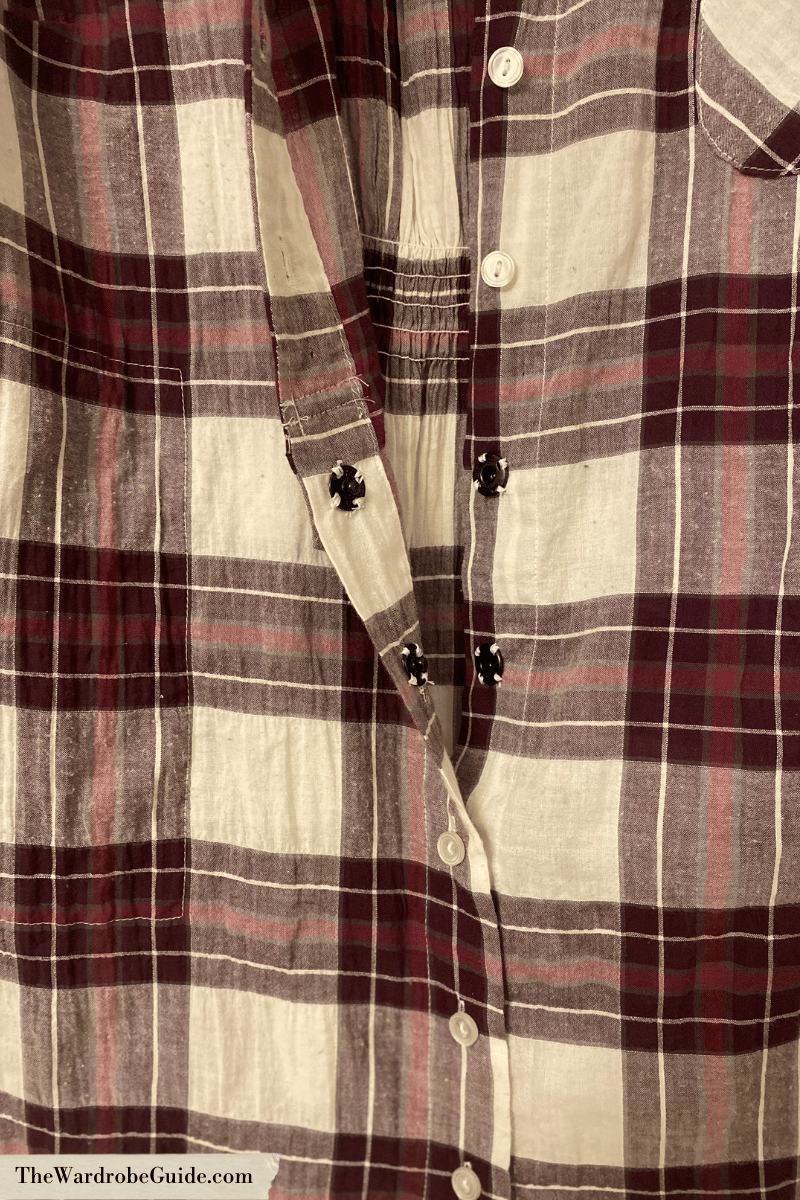
4) Check Your Work
After you finish stitching all your snaps on, you will want to check your work. Simply close the shirt by matching all the snaps together. By doing this, you are checking that the center front of the shirt is laying flat when it is closed and that there are no bubbles.
PHOTO: You can note that there is a small bubble that is worth investigating between the middle and right-most buttons.
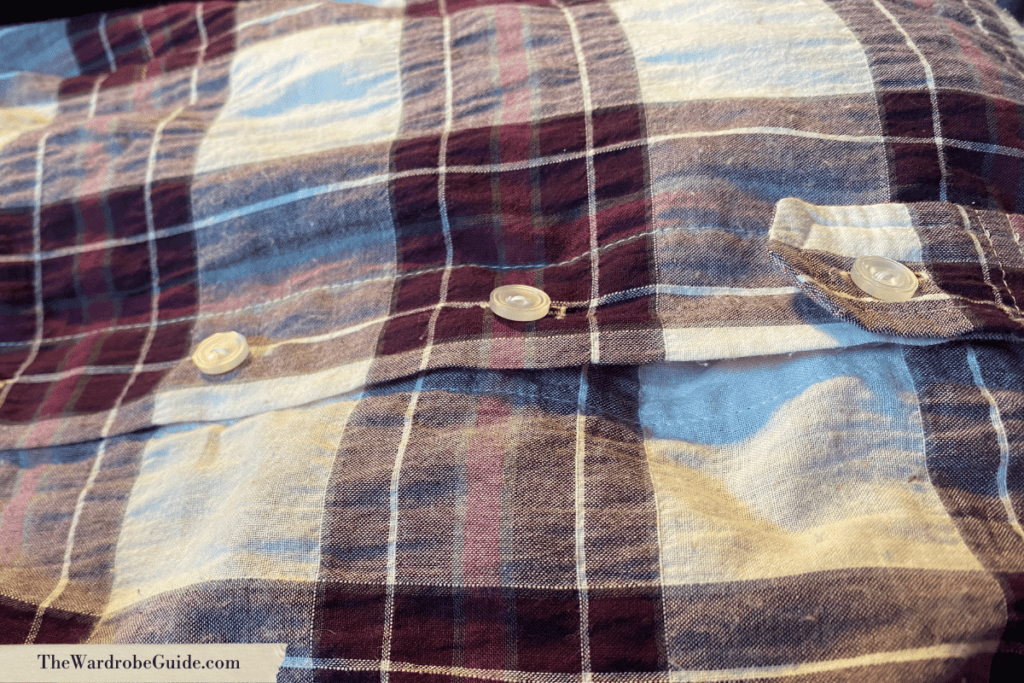
If you see a bubble or a gap, you might need to take off one or more of your snaps and adjust the placement.
PHOTO: It appears in this example, the male snap wants to sit slightly lower, so the female snap needs to be moved down slightly.
5) You’re Finished!
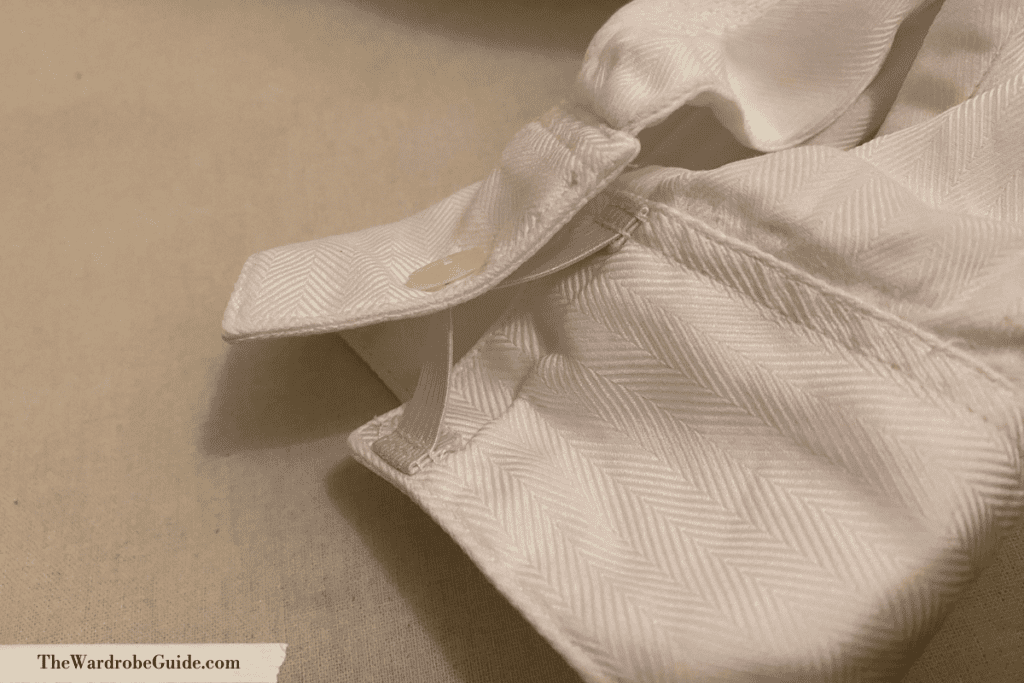
Cuff
- To begin quick rigging a shirt cuff, start by removing the outermost cuff button.
- In the place of the button you removed, you will add a small (around 2-3”) strip of ¼” elastic, which runs parallel to the edge of the cuff. Turn under the ends of this elastic and machine sew them onto the cuff.
- Reattach the button you removed to the center of the elastic strip.
If done correctly, the opening of the cuff now has enough give that someone can stick their hand through the cuff hole without having to unbutton it.
Tie
There are two basic ways one can quick rig a tie, which we will cover in later articles.
The first way, you can rig the tie so it meets at the center back of the neck of the wearer.
The second way to quick rig a tie is to cut the part that goes around the neck short, and stitch snaps or velcro onto the tie and the shirt itself to attach the tie to the collar when worn.
Further Reading
Anatomy of a Basic Dress Shirt
This is just the basics of how to quick rig a dress shirt. There are many more techniques that can aid the quickness of your changes, or make them even faster! Are there any tips or tricks we left out when it comes to quick rigging the center front and cuff of a dress shirt? Let us know in the comments or contact us!

