
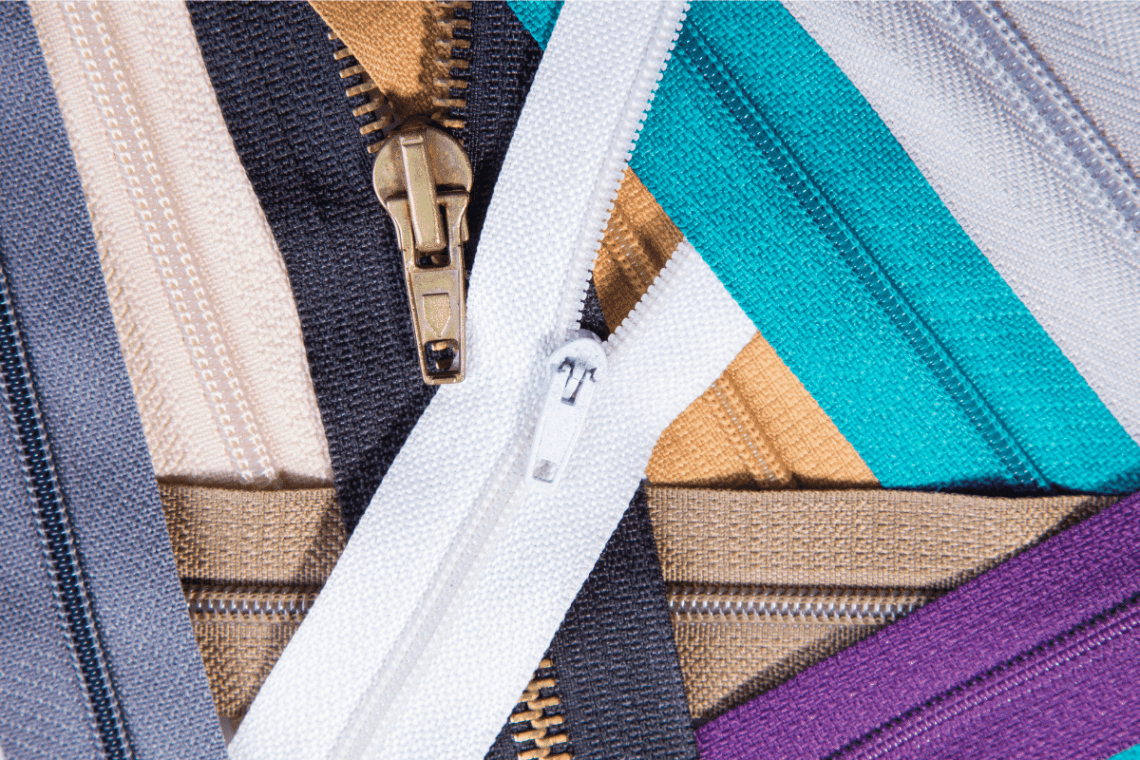
Zippers may seem like a small component, but they hold the power to transform the way we fasten and secure our belongings. From clothing to bags, zippers play a crucial role in our daily lives, ensuring convenience and functionality. However, not every zipper type is created equally.
Today in The Wardrobe Guide, we will journey into the world of zippers, exploring the diverse types available and shedding light on their unique features and applications. So, without further adieu, let’s zip through the fascinating universe of zippers!
This post may contain affiliate links. We only recommend products we have tried and tested ourselves. If you use these links to purchase something, we may earn a small commission at no additional cost to you. These links help us cover the running costs of The Wardrobe Guide! Read our full disclaimer.
History
Although zipper-like closures had been tried and tested since the 1850s, Engineer Gideon Sundback introduced the first model of the modern zipper in 1913. When zippers were first introduced, they were mainly used on shoes. At first, people were content with their button and hook closures and didn’t see a reason to use anything else for their clothes.
It wasn’t until the 1920s that the zipper was named as such, by shoemaker B.F. Goodrich, who named them after the “zipping” sound that the slider made. The term “Zipper” was registered as a trademark in 1925 by Goodrich. Even in the 20’s, zippers weren’t used widely in clothing yet. Some felt like zippers were morally corrupt; that it made it too easy to remove one’s clothes.
Zippers didn’t become widely used in adult clothing until the 1930s when French fashion designers started using them as closures for pants. This is also when we started seeing plastic zippers used in clothing. Before this point, zippers had been made using only metal teeth.
When Levis introduced the zipper fly into their 501 jeans in 1954, still not everyone was a fan. Allegedly, one critic famously asked “Why the heck did you put a zipper in your jeans? It’s like peeing into the jaws of an alligator!” We saw a rise in coil or invisible zippers in the the 1960s. Levis didn’t introduce zippers to their entire line of jeans until the 1970s.
Zipper Anatomy
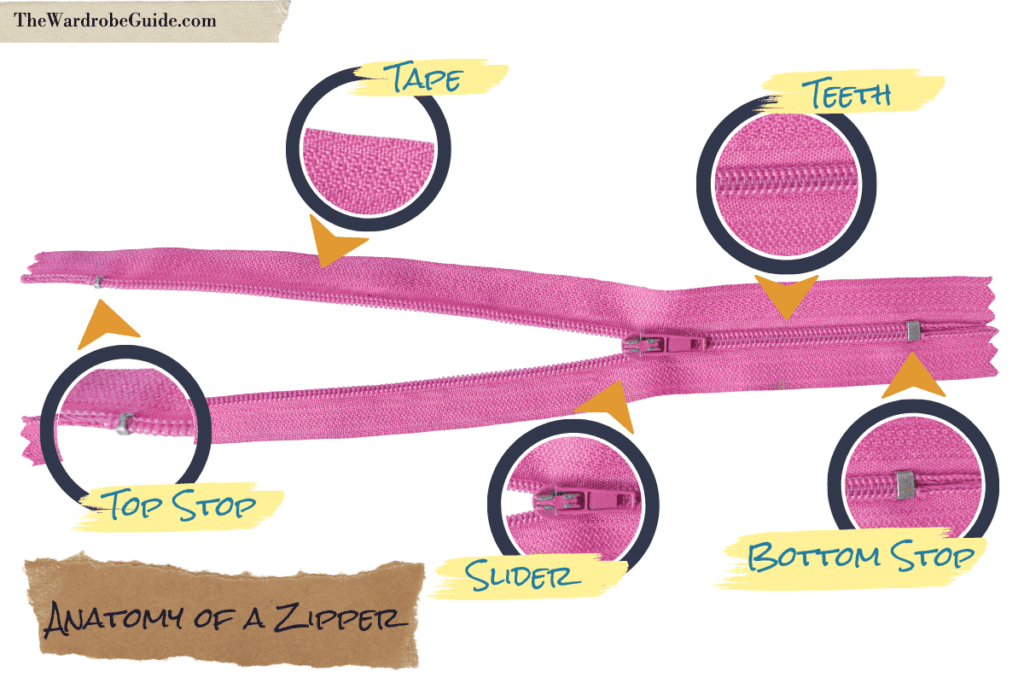
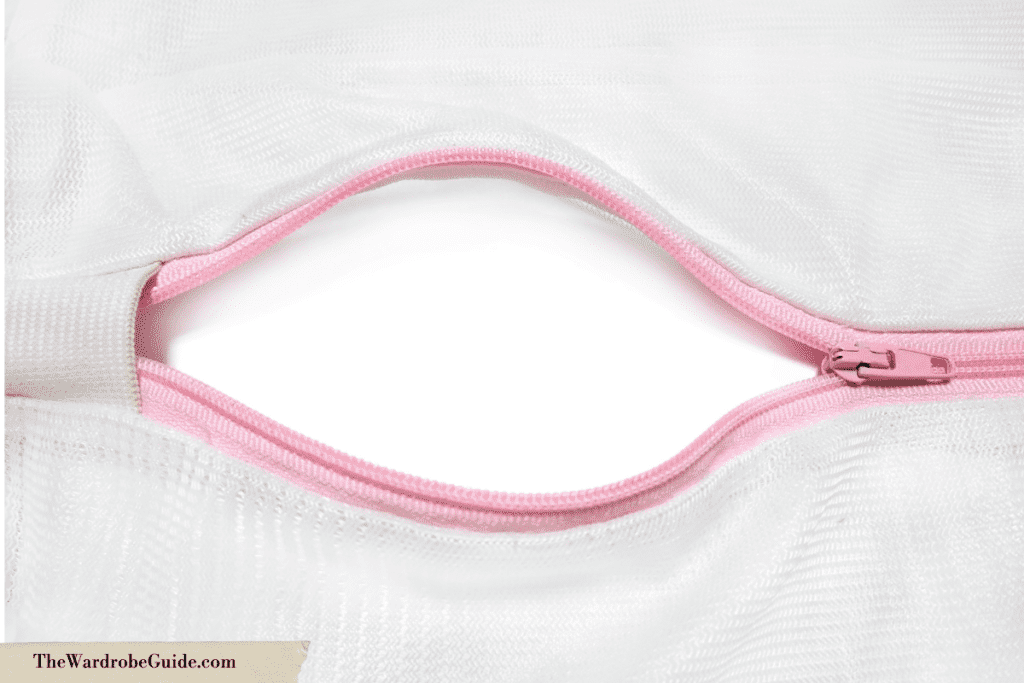
Slider
The zipper’s slider is the part of the zipper that rides up and down the track of the zipper. Its function is to join the two sides of the zipper teeth together to close and then reopen the zipper. The slider can be made out of plastic or metal.
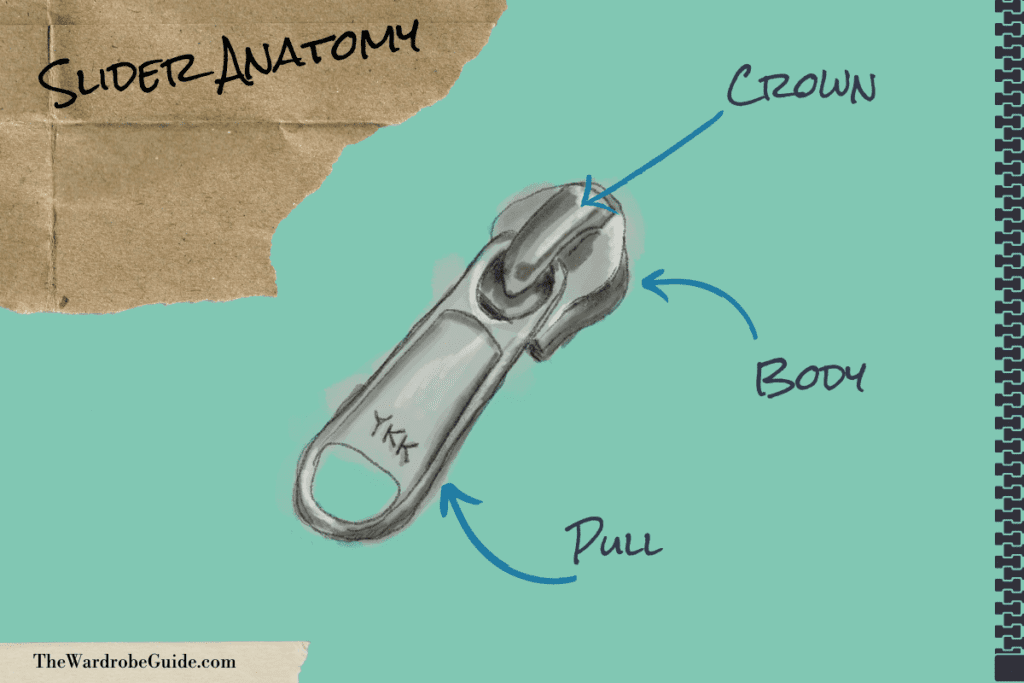
Zipper Pull
A zipper pull is the piece attached to the slider for the user to hold onto. This allows for an easier grip on the zipper. A zipper pull can be made out of Metal, Plastic, or Fabric. For theatrical purposes, adding a longer fabric pull onto an existing metal pull can help give the dresser even more leverage on the zipper during a change.
Teeth
The teeth of the zipper are also known as the “elements”. The teeth are the small parts that you will find between the top and bottom stops on the inner edges of the zipper tape. They become locked together and unlocked by the slider to create a secure closure. Zipper teeth can be made out of metal, plastic, or nylon.
Tape
This is the strip of fabric on which the teeth of the zipper are mounted to. The tape is the part of the zipper that can be stitched on when applying the zipper to a garment.
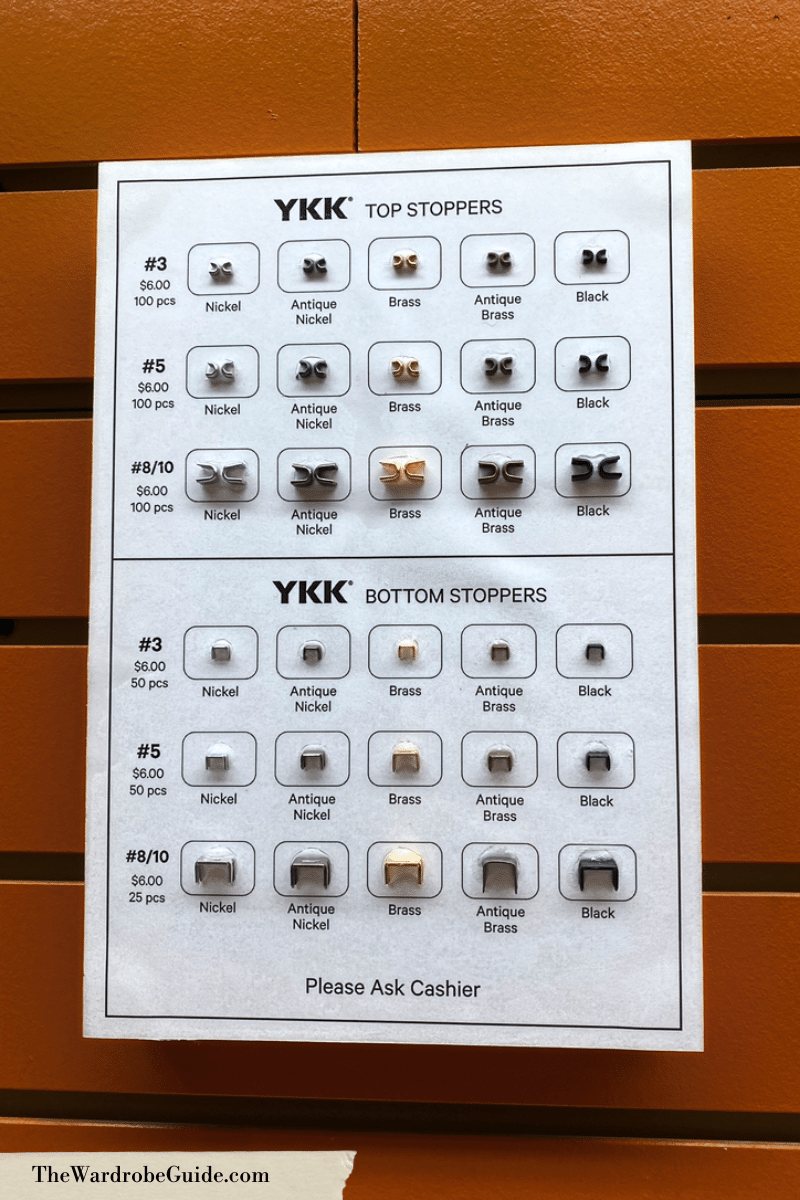
Top Stop
The top stops on the zipper are small pieces at the very top end of the teeth (where the zipper slider sits when it is fully closed). These might look like small metal brackets pressed onto the top of each side of the zipper and they prevent the zipper’s slider from sliding off the teeth and coming detached at the top of the zipper.
If you purchase a pre-cut zipper at the correct size, your top stops will already be ready and in place on the zipper. However, if you purchase a continuous zipper, or a zipper that otherwise needs to be cut to size, you will have to add the stops yourself. This is a fairly easy process. First, you need to remove a couple of the teeth where you want your zipper to end. Then, you can easily clasp a stop onto the top of the zipper using a pair of pliers.
Bottom Stop
The bottom stop of a zipper can look slightly different depending on if the zip is separating or close-ended. On a closed-end zipper, this bottom stop might just look like a staple-like piece of metal (or even fabric) that link the two sides of the zipper, and prevent the slider from falling out of the track at the bottom of the teeth.
As with the Top Stops, if you purchase a pre-cut zipper at the correct size, your top stops will already be ready and in place on the zipper. However, if you purchase a continuous roll of zipper, or a zipper that otherwise needs to be cut to size, you will have to add the stops yourself. Adding a bottom stop is fairly simple as well. Find where you would like the zipper to end, and use pliers to press a metal stop into the zipper or stitch a piece of fabric or ribbon across the place where you would like your slider to stop at the bottom of the teeth.
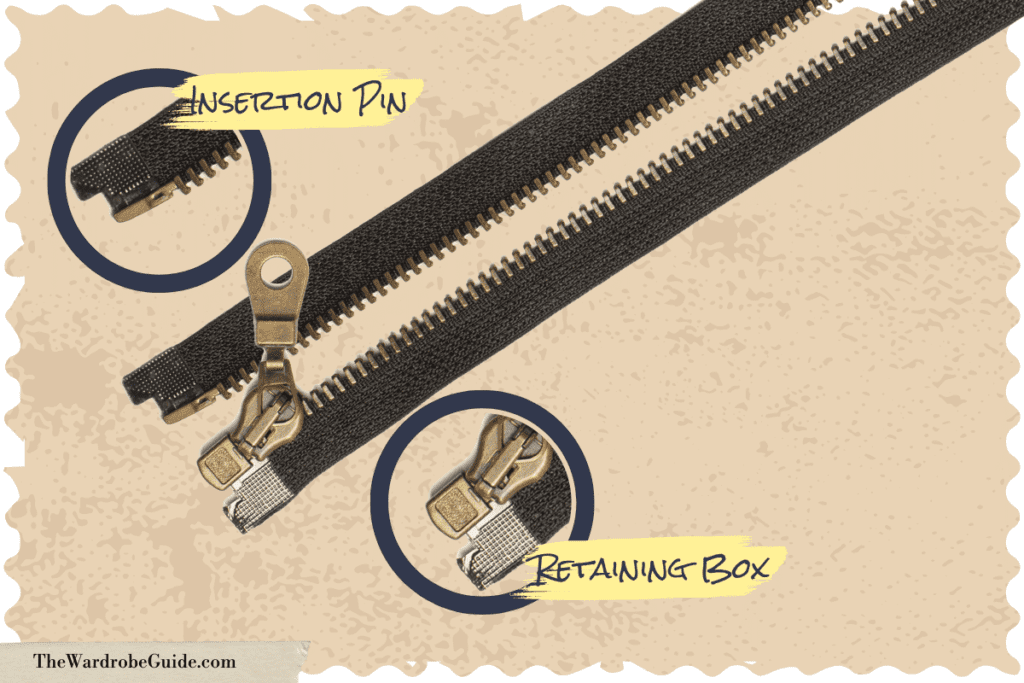
Separating zippers have 2 other parts in the place of a bottom stop. These pieces are as follows:
Insertion Pin
This is at the bottom end of the zipper tape opposite the side containing the slider. It looks like a slightly longer tooth and is used to help guide the zipper teeth into the slider and the box pin. An insertion pin cannot be added to a continuous zipper chain.
Retaining Box
Also called a “Starter Box” or “Box Pin”. The retaining box is a small box made out of plastic or metal, that one can match the slider up with to be sure that the two sides of the zipper are aligned. It is found on the same side of the separating zipper as the slider and can be made of plastic or metal. A starter box cannot be added to a continuous zipper chain.
Zipper Sizing
When shopping for a zipper, the two most important measurements are the length of the zipper, and the size of the zipper’s teeth.
Length
When measuring the length of a zipper, you are measuring from one zipper stop to the other zipper stop down the tape. the “tails” of tape at each end of the zipper should not be included in your measurements.
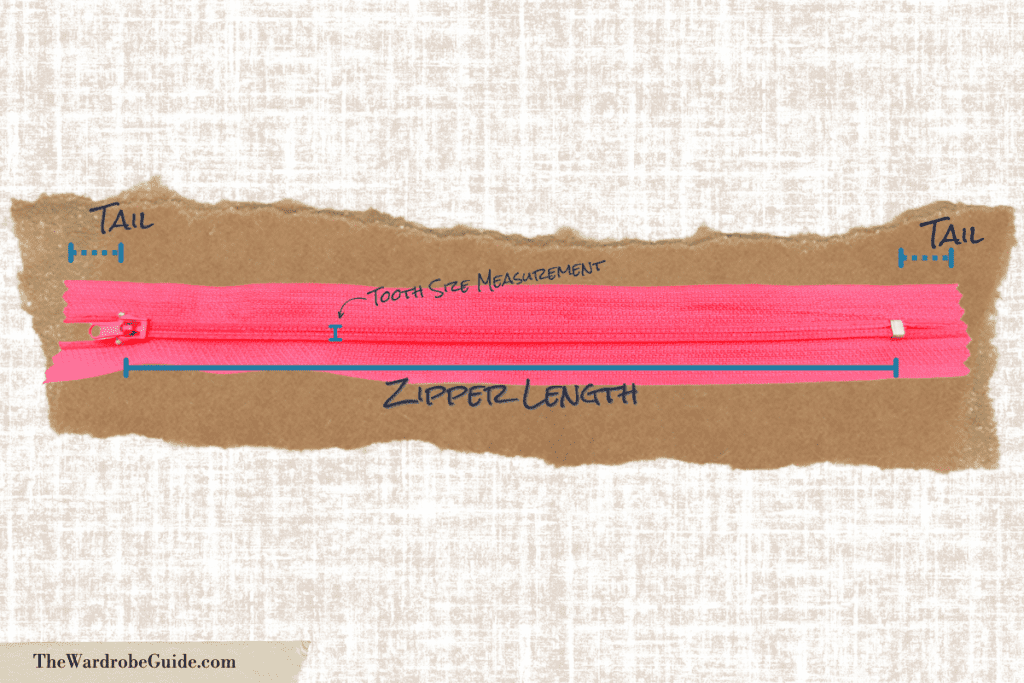
Size of Teeth
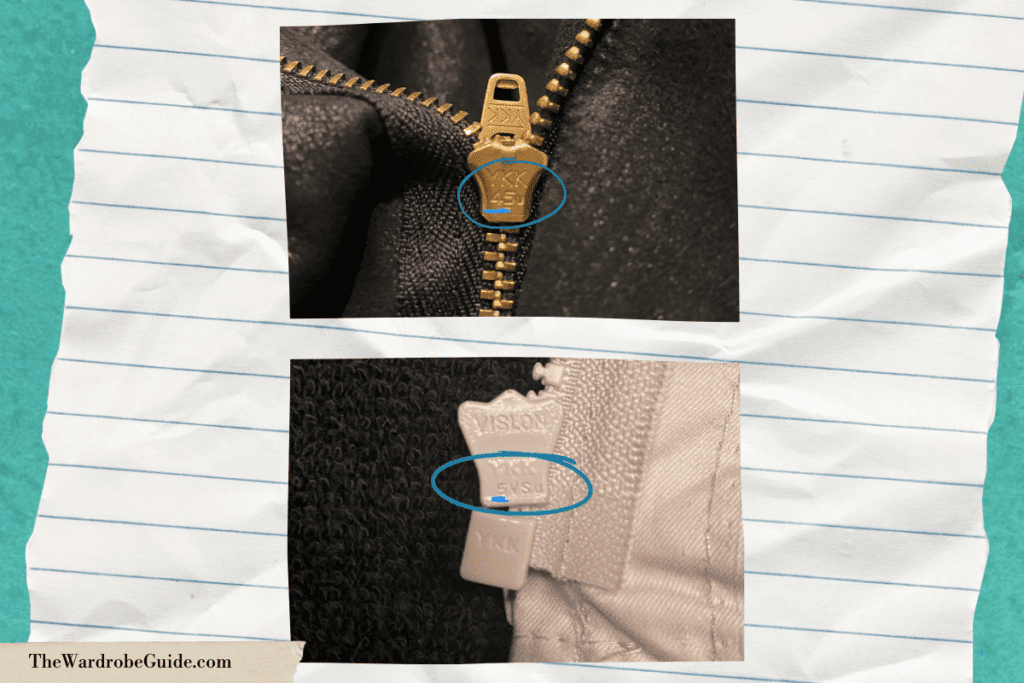
YKK zippers have numbers for the different sizes of teeth you can buy. Size 3 is the smallest zipper you will find, while size 10 is the largest. These size numbers are actually the width in millimeters between the outer edges of the teeth of the zipper. If you are unsure about what size a zipper is, YKK zippers have their size printed on the back of the slider.
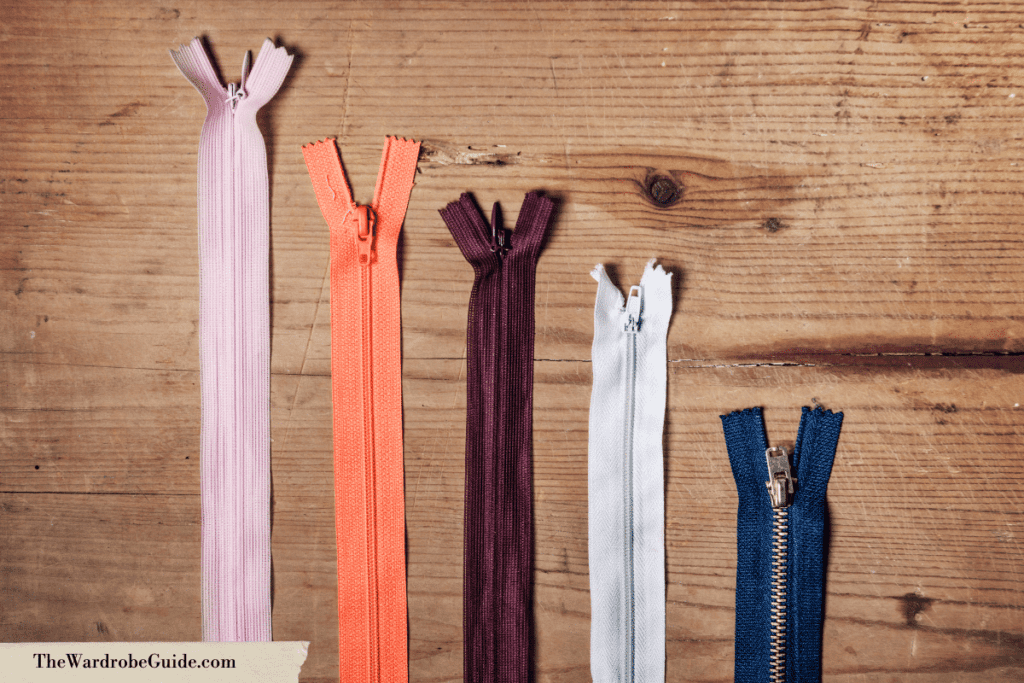
Zipper Types
Zipper Type: Teeth
Molded
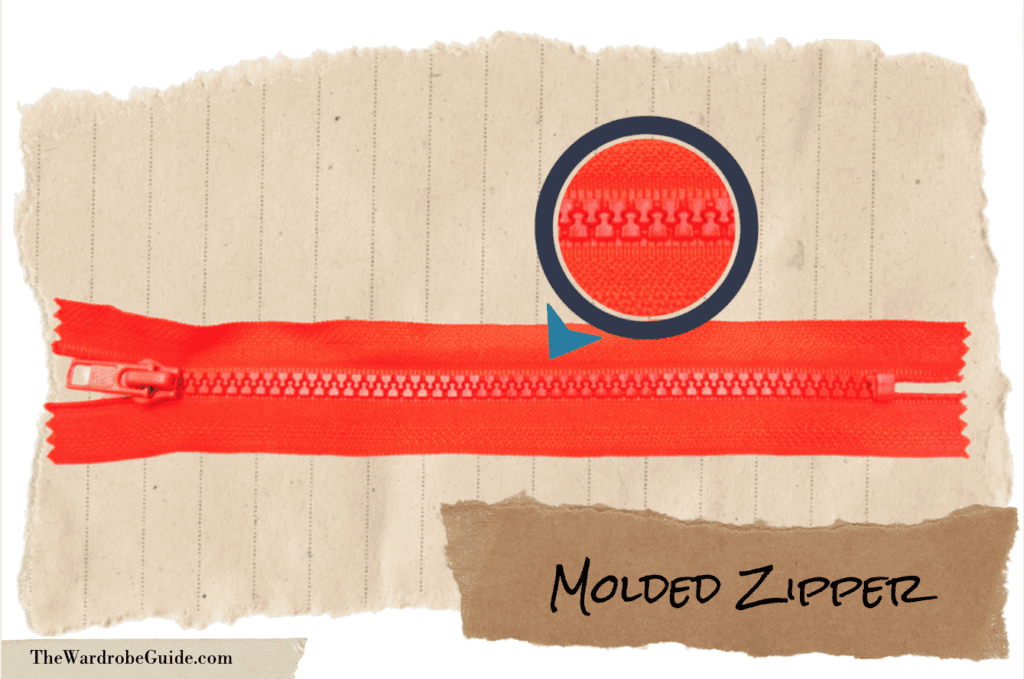
Also known as VISLON zippers by YKK. These zippers are identified by their teeth made to the shape of molded plastic. Each tooth is separately fused onto the tape, which makes these zippers very easy to alter. Molded zippers are favorites in the theatrical wardrobe community, as their incredible strength and durability make them highly reliable in quick changes.
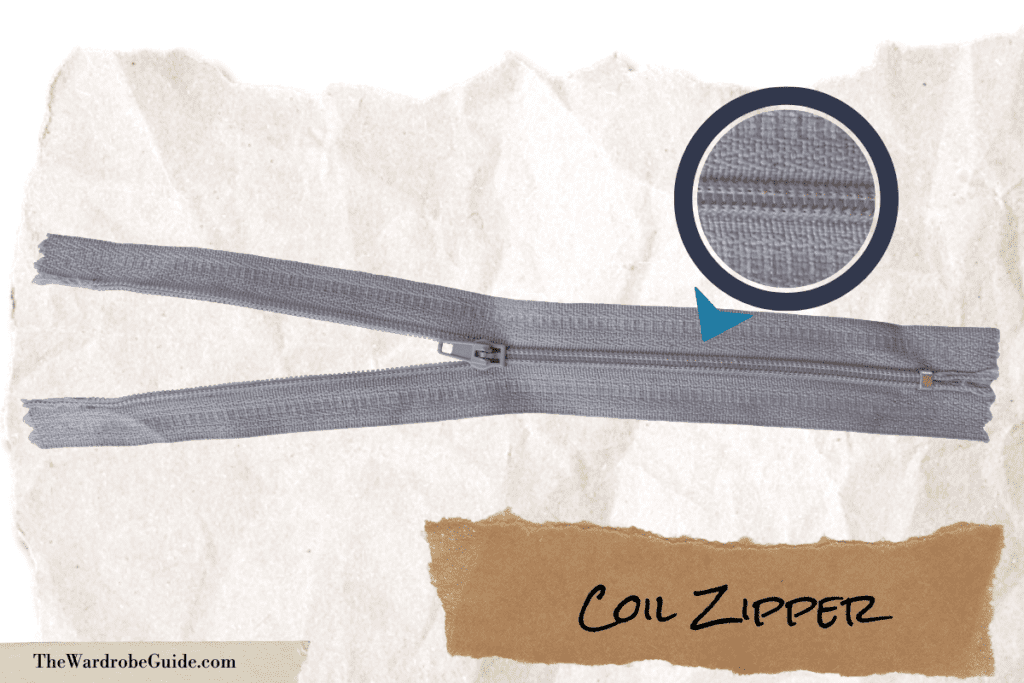
Nylon Coil
Nylon Coil zippers are named as such for their teeth that are one continuous piece of nylon monofilament sewn onto the zipper tape. The teeth of these zippers are actually small coils. While these zippers are very flexible and popular in store-bought clothing, their teeth are rather fragile and prone to damage over time. Because of this, this type of zipper might be finicky in a quick change where you need to close a long seam, such as the back of a dress.
Metal
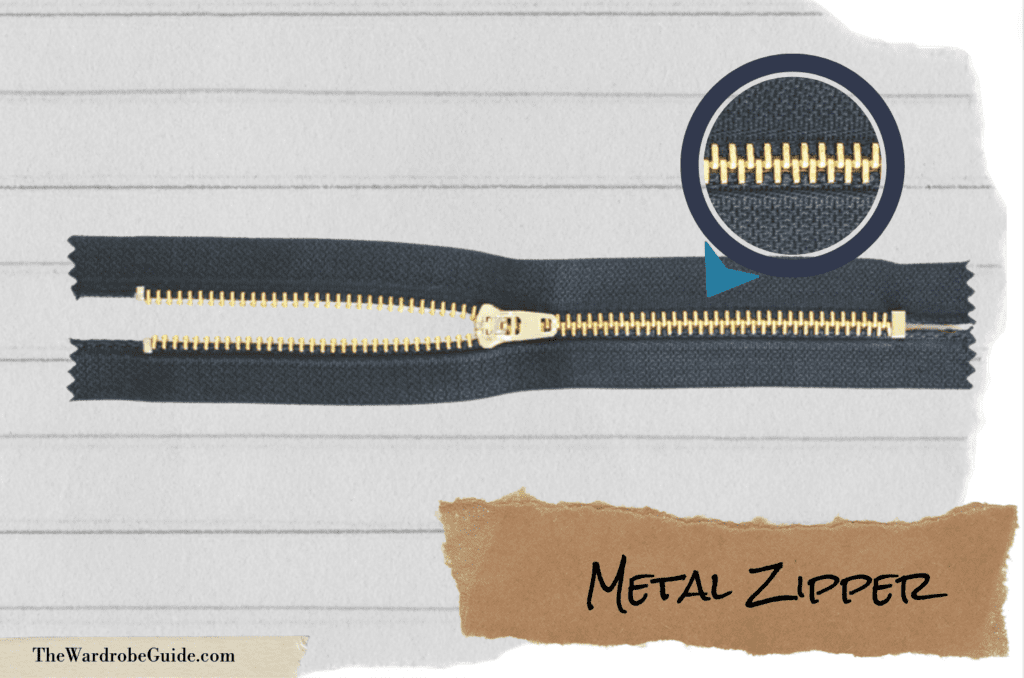
Metal zippers are the first zipper ever to be produced! There are two types of metal zippers. One type, the teeth are made of metal wire (similar to how a coil zipper is made). The second type of metal zipper has teeth that are cast directly onto the zipper tape (similar to a molded zipper). Metal zippers can have a variety of finishes, such as brass, silver, or gold.
Protip: When caring for a metal zipper in a theatrical context, you may want to have a tube of zipper glide on hand to touch up the teeth from time to time. This is because they may start to get worn in a way that makes it difficult for the slider to glide over the teeth with ease.
Zipper Type: Function
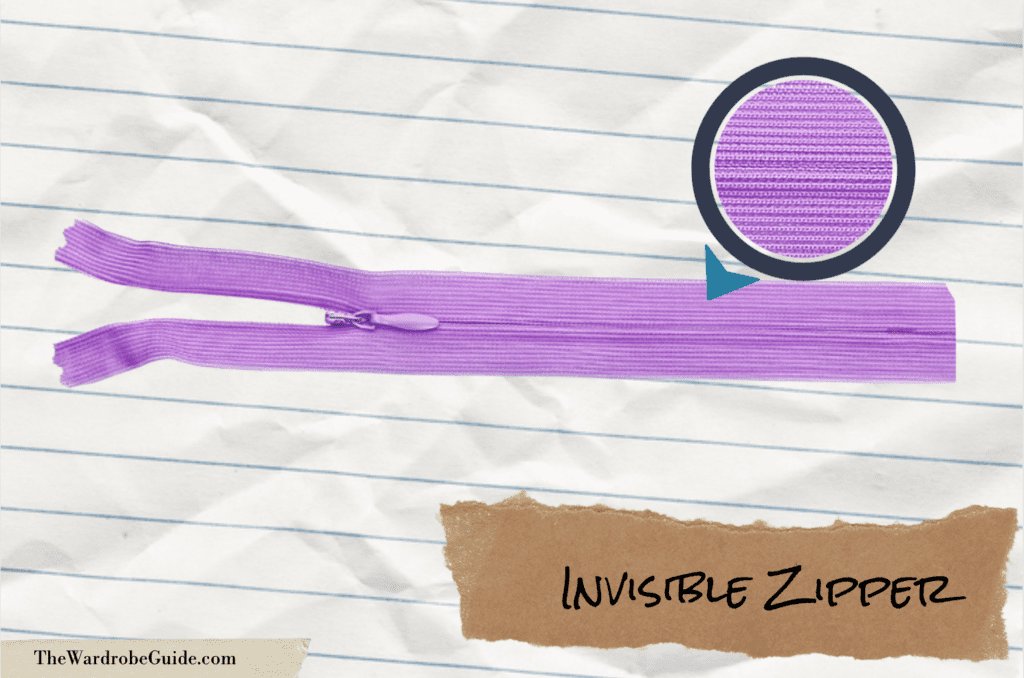
Invisible
Also known as a concealed zipper. The teeth of an invisible zipper are actually on the reverse side of the zipper tape, so they are not visible from the front. When sewn into your project, an invisible zipper will disappear into the seam. To create the low profile of an invisible zipper, both the teeth and pull are on the smaller side. Because of this, invisible zippers can have a hard time closing over waist seams or other bulky areas. Invisible zippers aren’t the most functional in a theatrical environment for this reason.
Specialty or Fashion
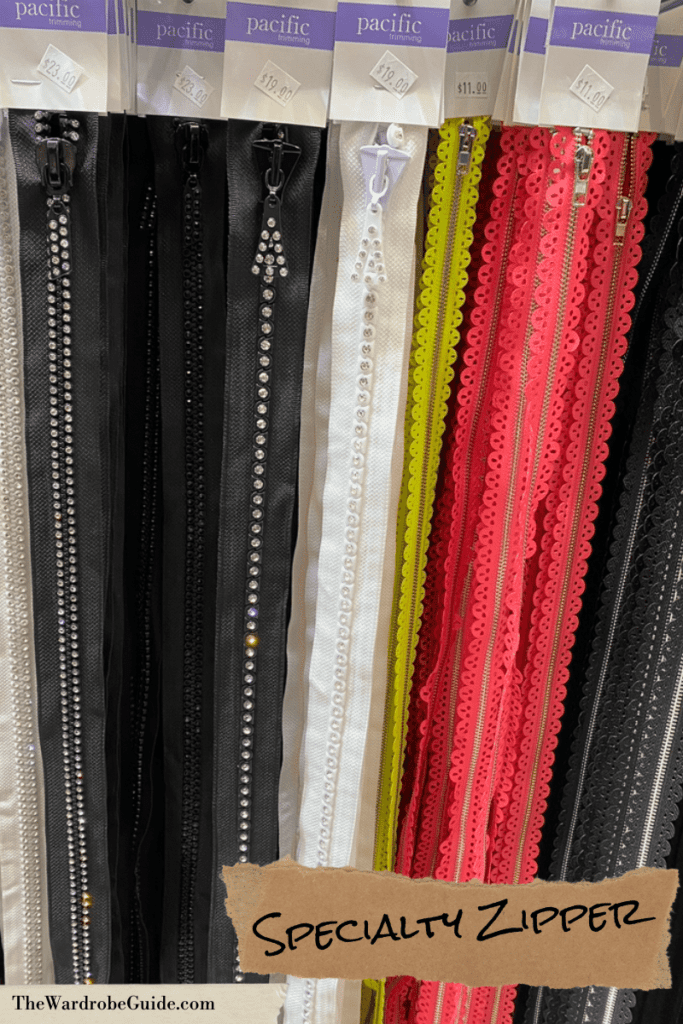
There are many zippers on the market that are really meant to draw people’s attention to the zipper tape or teeth. These zippers are called specialty (or fashion) zippers because you really can’t just use them on any old garment. They are sure to make a statement wherever they are used!
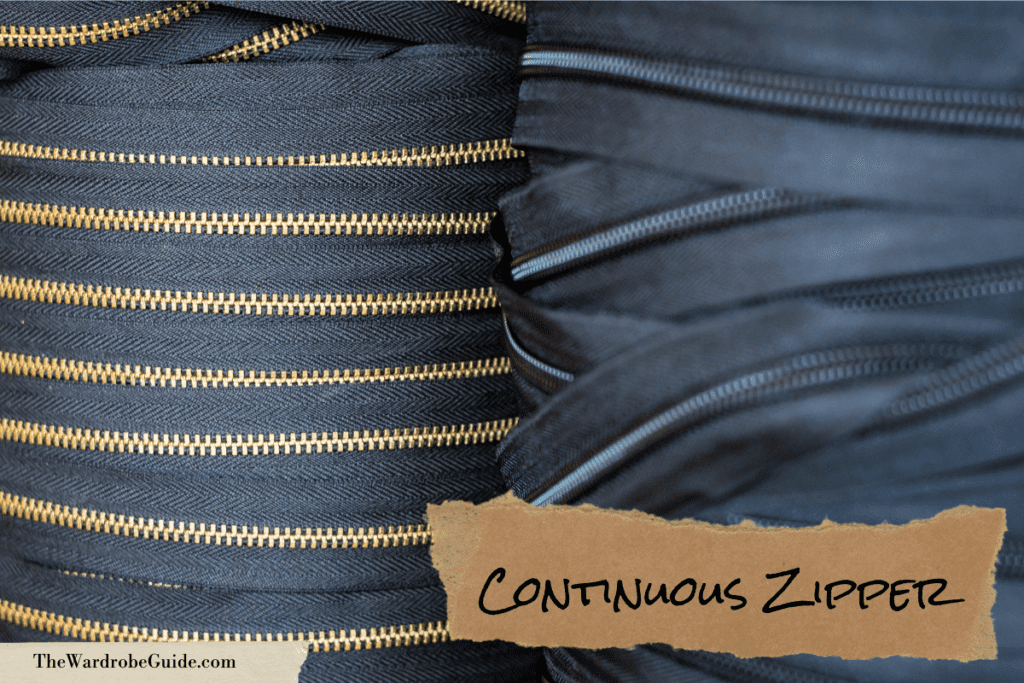
Continuous
A continuous zipper might also be referred to as a zipper by the yard. This zipper will typically only come with the teeth and tape, and you will buy and apply the rest of the parts of the zipper and cut it down to the size you need on your own. A continuous zipper cannot be made into a separating zipper.
Separating
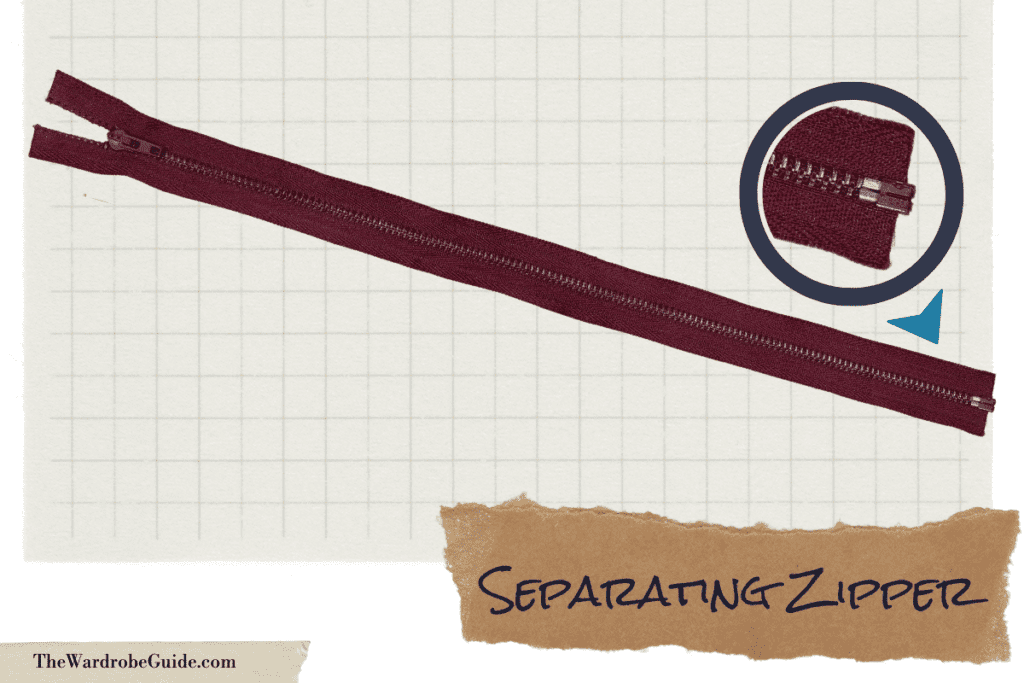
A separating zipper is identifiable by its ability for the two sides of teeth to fully separate from each other. The bottom end of this type of zipper is joined by a box and pin mechanism. You might recognize this kind of zipper from your favorite jacket or sweatshirt.
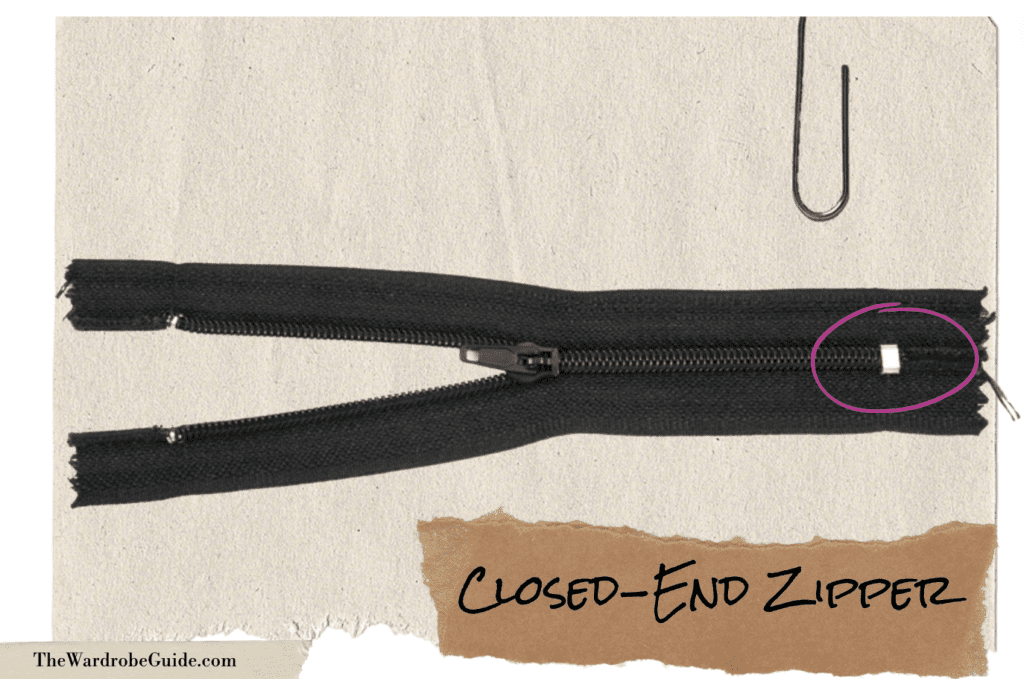
Closed-End
This type of zipper is identified by the presence of a single zipper stop at the bottom of the teeth which keeps the slider from fully separating the zipper in two. Even when fully unzipped, this type of zipper remains as one piece. Closed-end zippers might be found on the fly of your jeans, or in the back of a dress.
Two Way
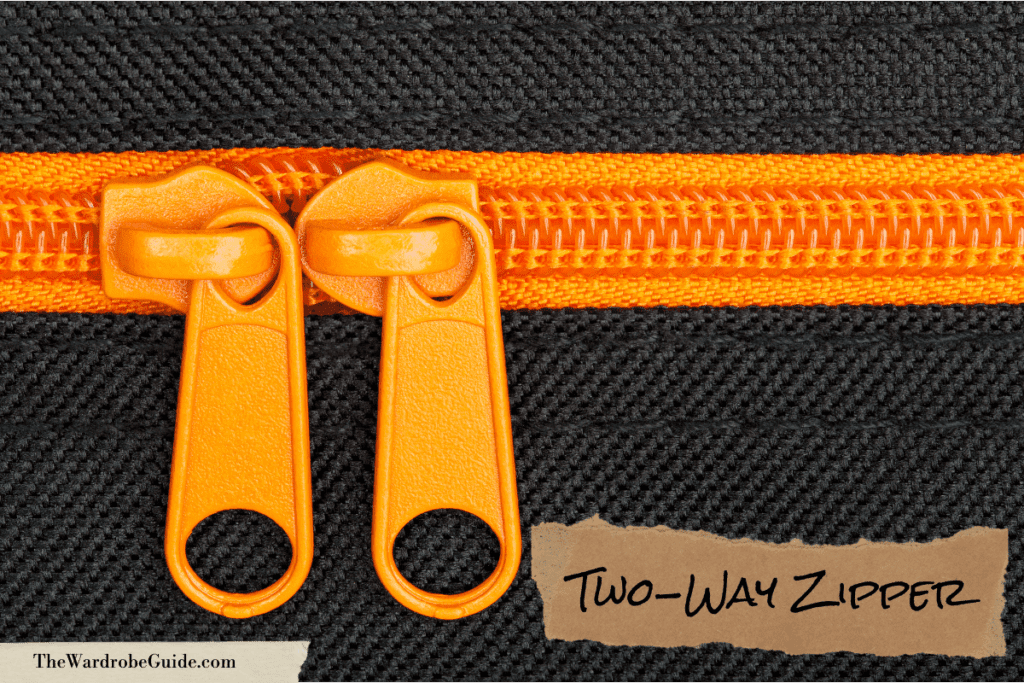
These zippers are also known as two-headed, or dual zippers. They are named as such for the two sliders present on the track. This type of zipper is mostly used on coats, sleeping bags, or luggage.
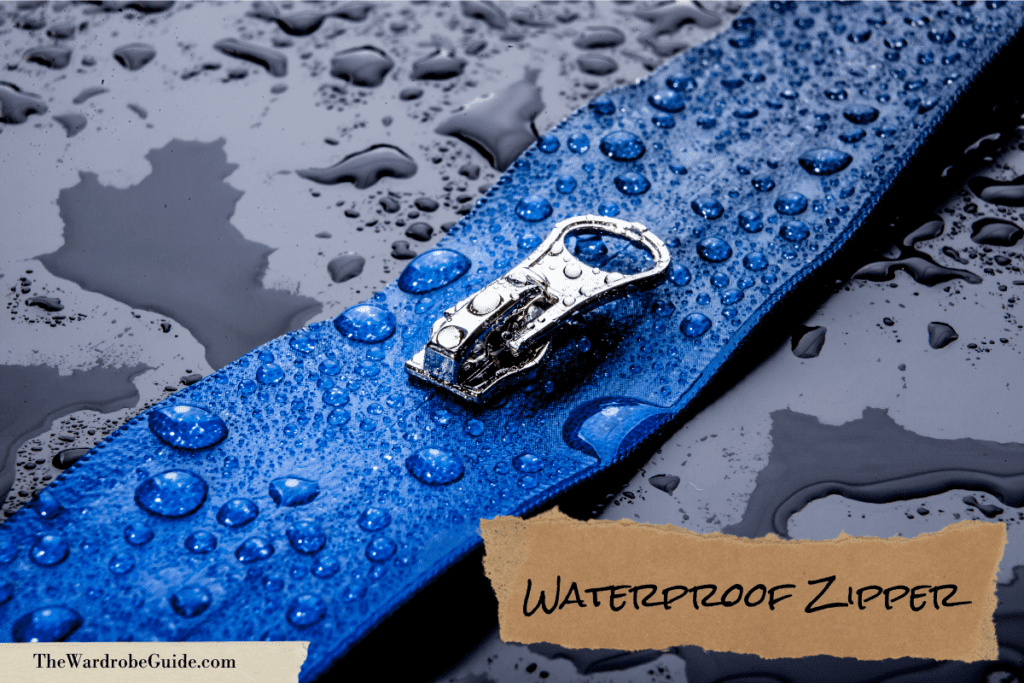
Waterproof
Waterproof zippers have waterproof tape that protects the teeth from the outside of the garment. These zippers aren’t widely used in theatrical productions, but you might see them used on outdoor gear such as tents or scuba gear.
Reversible
There are two types of reversible zipper. The first type are identified by the ability to slide the zipper pull around to either the back or front of the zipper. The second type of reversible zipper might have a slider with two zipper pulls- one on each side. These zippers are found in jackets, bags, and other clothing that are considered reversible.
Zipper Type: Application Techniques
Centered Zipper
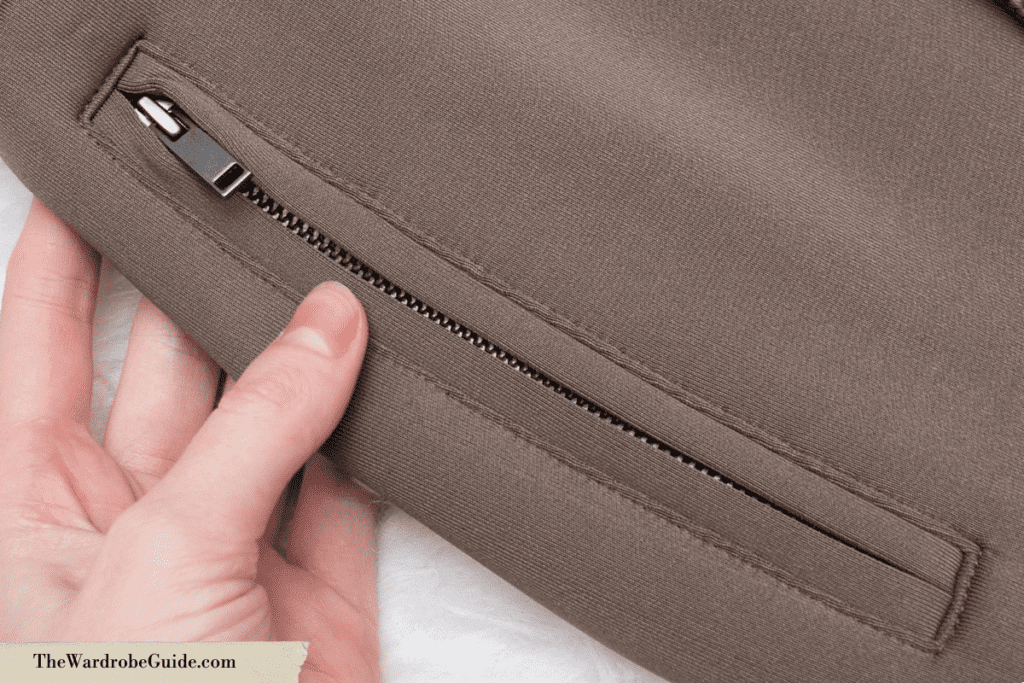
In a centered zipper (typically found in the Center Back of a garment), both sides of the fabric seam will butt up to each other. This is similar to how an invisible zipper looks after it is applied, but the major difference with a centered zipper is that you can see both lines of stitching for the zipper on either side of the seam. So while the zipper teeth might be hidden from the outside of the garment for the most part, it is still clear that there is a zipper present.
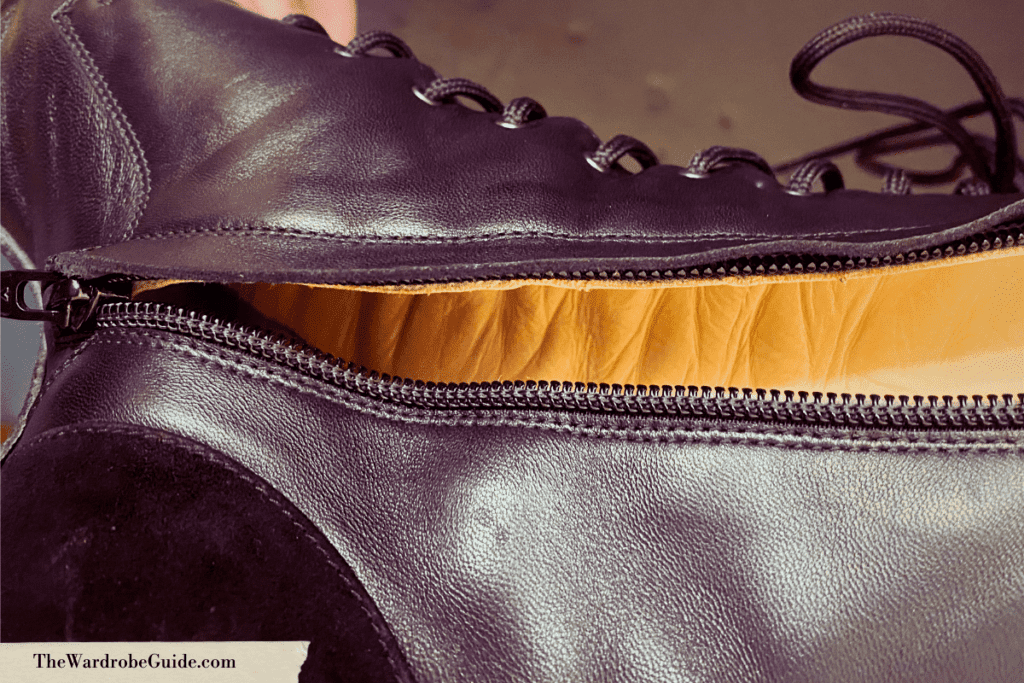
Lapped Zipper
On a lapped zipper, only one side of the garment’s fabric will overlap the teeth of the zipper. The other side of the zipper will have the seam stitched down tightly to the zipper’s tape. This type of application is very popular on shoes and boots.
Exposed Zipper
On an exposed zipper, all the teeth will be visible to the outside of the garment. On some exposed zippers, even the tape will be visible on the outside of the garment, depending on the design. Generally, if the zipper is stitched in a way that you can see it from the outside of the garment, it is considered to be exposed. Fashion or specialty zippers are often applied to be “exposed.” In Wardrobe, if a zipper is exposed, consider talking to the design team before shopping the zipper.
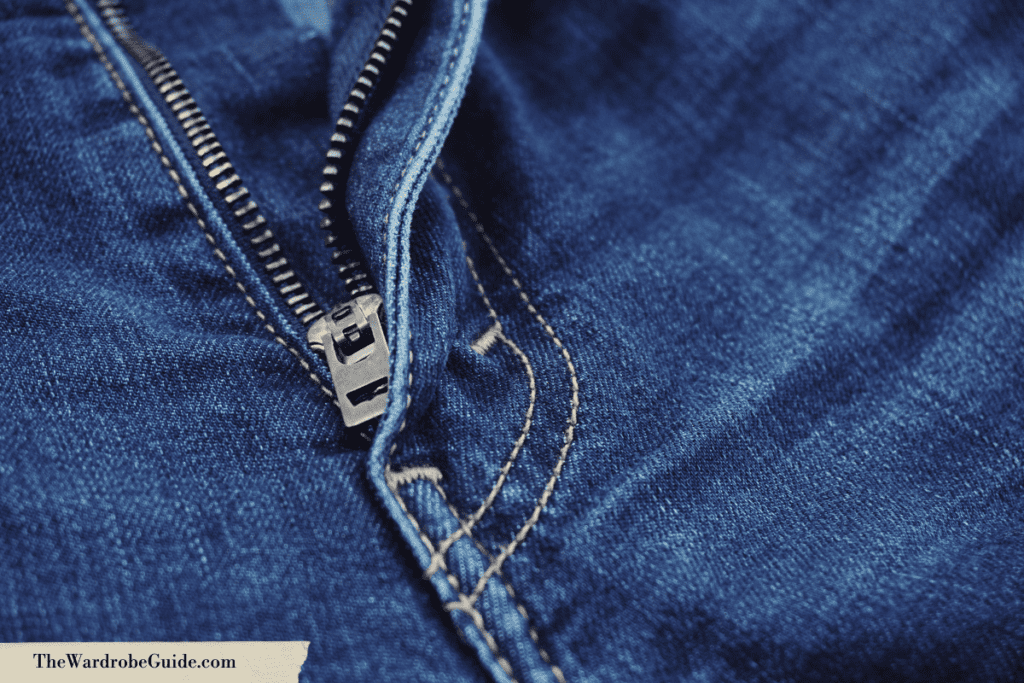
Fly Zipper
Fly zippers are, you guessed it, typically used in the fly of pants. When applying this zipper, one side of the zipper will be attached to an overlap (hiding the teeth of the zipper) while the other side of the zip will be attached to an underlap (protecting undergarments from being damaged by the zipper).
Invisible (Concealed) Zipper

When an invisible zipper is applied correctly, it is fully invisible to the outside of the garment. This means that not only do the seams on each side of the zipper match up, but there is also no visible stitch line for the zipper when it is worn. Invisible zippers are typically the most delicate zipper type, and may not be friendly for heavy use on theatrical costumes.
Tools Needed for Applying a Zipper
Jewelry Pliers– Helpful for pulling teeth off a zipper to add stops. Also helpful to have to press the stops into the tape of the zipper.
Zipper Pliers– These help with the removal of teeth from zipper tape.
Zipper Foot– Usually a slimmer foot on your sewing machine. Important to use so your machine allows you to stitch right up against the teeth of the zipper without pushing it away. Reminder to mind the make and model of your machine if you need to buy a new zipper foot.

Invisible Zipper Foot– A foot used specifically while stitching invisible zippers. Allows the stitch line to get even closer to the zipper teeth. Reminder to mind the make and model of your machine if you need to buy a new zipper foot.

Zipper Stops– There are many different types and sizes of top and bottom stops that can be purchased. At first glance, they look like small staples. They are sized according to the size of the zipper you are finishing.
Shopping for a Zipper
Questions to ask when picking a zipper
- Is the zipper part of the design? If so, consult the designer before adding it into the garment to be sure that is what they want.
- Will the zipper be used in a quick change? If so, you might look to a size and type of zipper that is more durable and reliable.
- What is the garment made out of? This might dictate how “heavy duty” you are able to go when purchasing your zipper.
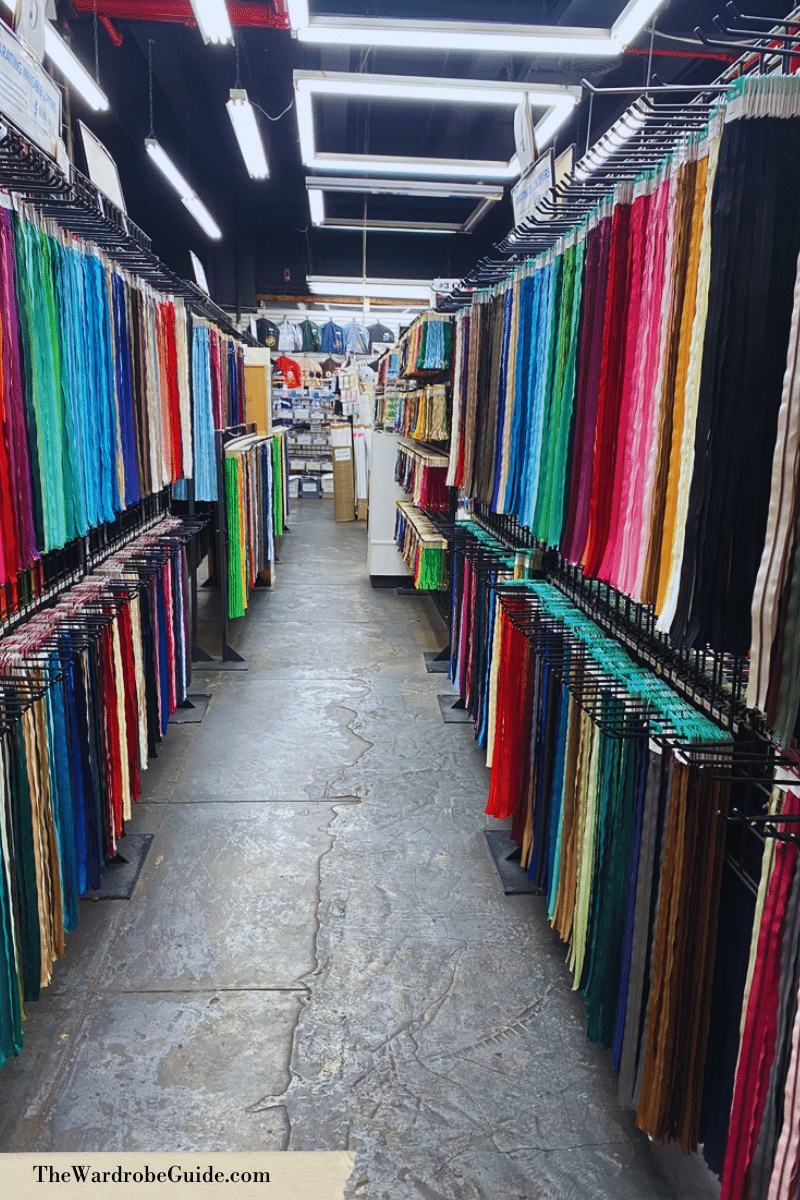
Where to Buy a Zipper
The Wardrobe Guide is not affiliated with any of the following businesses. These are simply the stores we have frequented when looking to buy zippers for theatrical purposes.
Upcoming Articles
How to sew a zipper
Zipper Repair
There you have it; our overview of the different types of zippers. We will continue to look into zippers, and their application and repair in future articles. In the meantime, is there anything else you want covered about different types of zippers? Any interesting facts or tips about how to pick the best zipper for your next project? Let us know in the comments or contact us!


